Disqover Agency does not provide services to citizens of Russia and Belarus!
Menu
hello@disqover.agency
A Guide to Creating Your Account and Selling on Amazon
Contents
Marketplaces are occupying an increasing share of the e-commerce market. In 2018, Amazon made up 49% of online sales in the USA. Interestingly, Ukraine ranks among the top 9 countries with more than 10 thousand sellers on this platform. Nevertheless, creating an Amazon account is considered to be a hard thing.
To make the process simpler, we’re offering you to follow our step-by-step guide to creating your Amazon seller account.
Creating Your Account Is the Key Yet Hard Step to Sales
Ukrainian producers should grow their sales by expanding to foreign markets. Developed countries offer much larger markets to make sure everyone has enough space for sales. Moreover, they recover faster from economic crises.
Another advantage is that marketplaces give quick access to large sales markets and end consumers, while the threshold for entering the market is relatively low and easy.
Creating an account is the major problem many potential sellers face at the beginning. On Amazon, this process is fraught with many pitfalls: the paperwork, transfers, proof of residence, etc. Although we recommend consulting professionals right away, let’s take a look at how it works.
Step 1: The Paperwork
Creating an Amazon account for an individual requires you to check whether all of the documents are at hand:
A copy of your passport or a certified translation of your internal passport
Contact details, such as your name and surname according to your passport, email, and phone number
Credit card details
A USA bank account for receipts you earn on Amazon
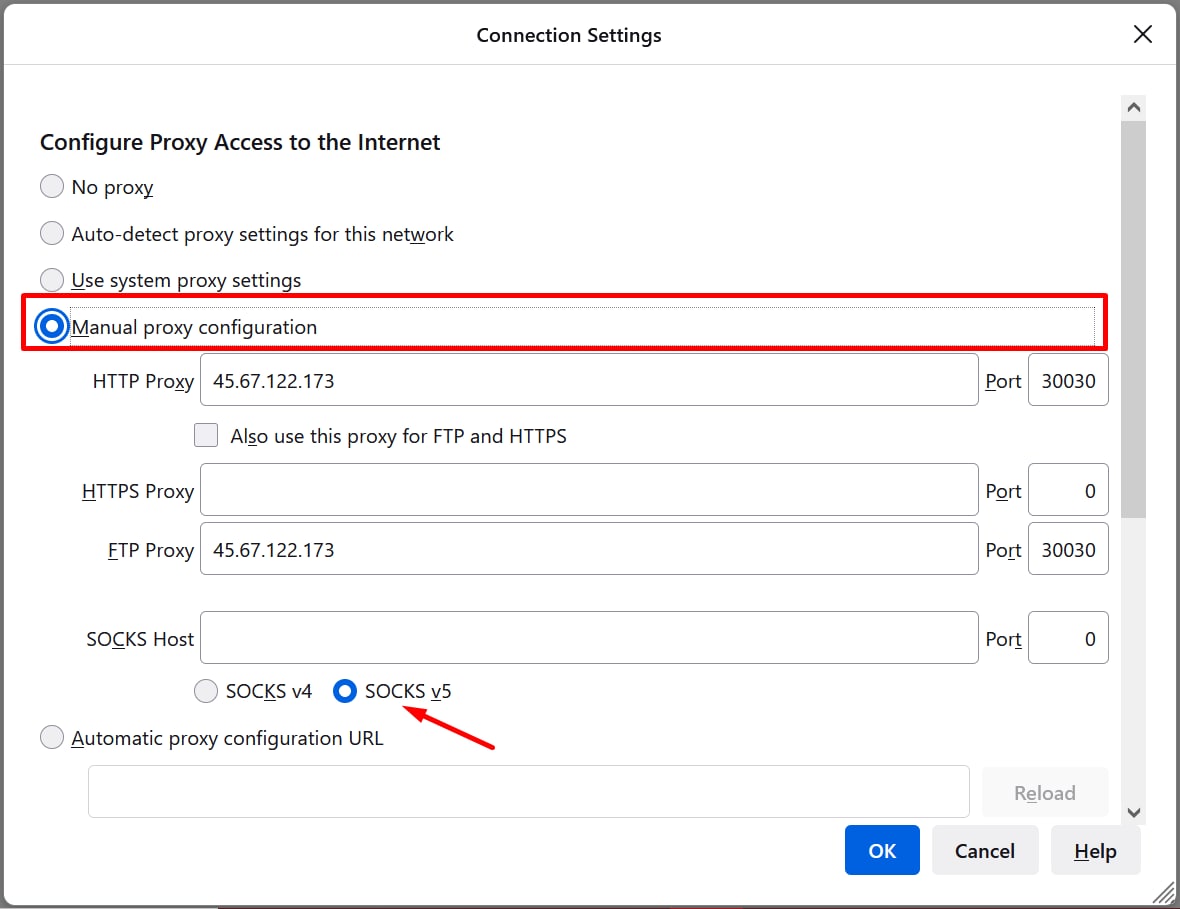
Step 2: Setting up a Connection to a Proxy Server
Your next step is to buy IP addresses and connect to a proxy server.
If Amazon catches you logging in to several accounts with the same IP address, it’ll immediately block you. Here’s a case: when several neighbors logged in to different accounts with the same IP address in their apartment block, Amazon blocked them. For that reason, you’d better always log in with a secure IP address.
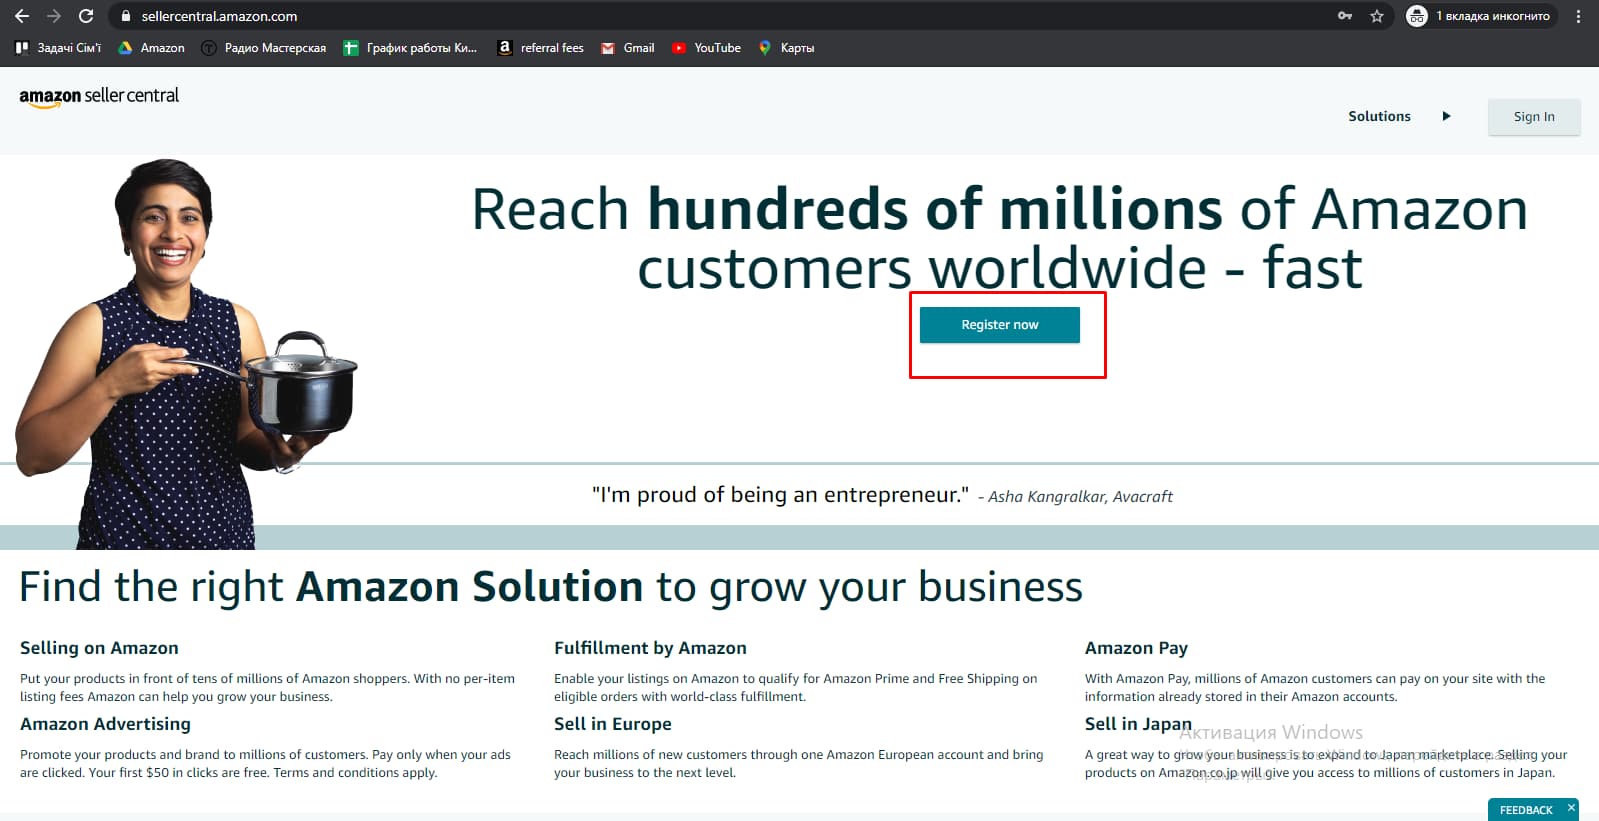
Step 3: Creating an Account
Let’s now create a seller account. The first thing to do is set up a connection to a proxy server. After that, you need to log in to an existing buyer account and click the “Register now” button on sellercentral.amazon.com.
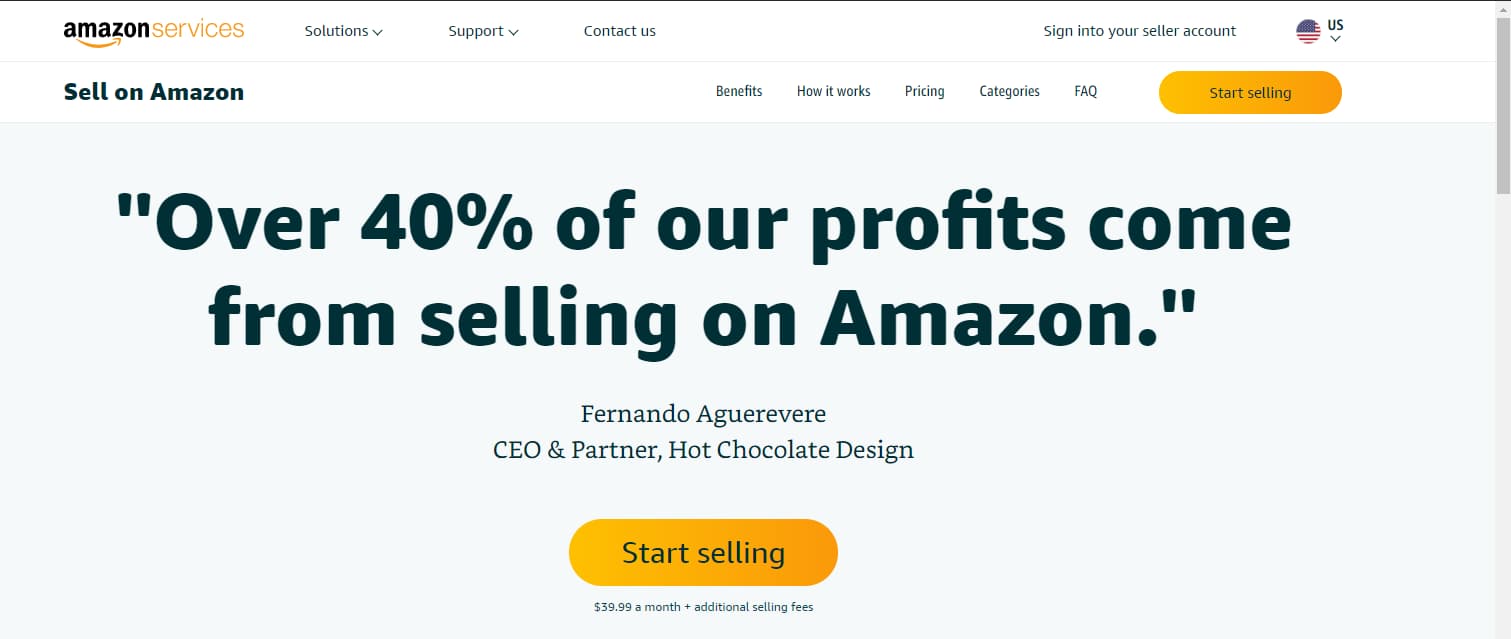
Here’s a step-by-step process:
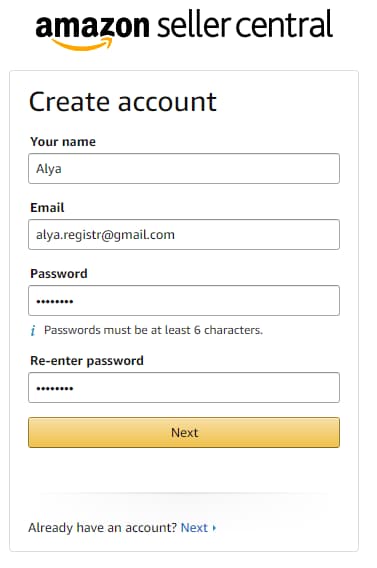
Click the “Start selling” button.
Next, enter your email and password and click “Create your Amazon account”.
Enter your details in Latin characters.
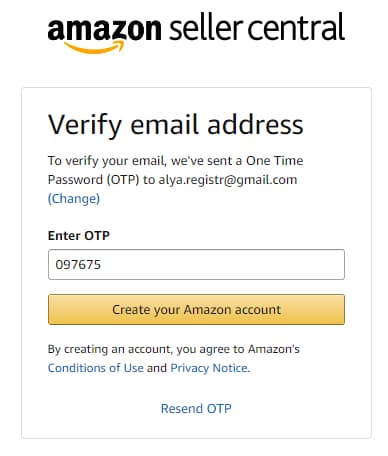
4. Confirm your email address.
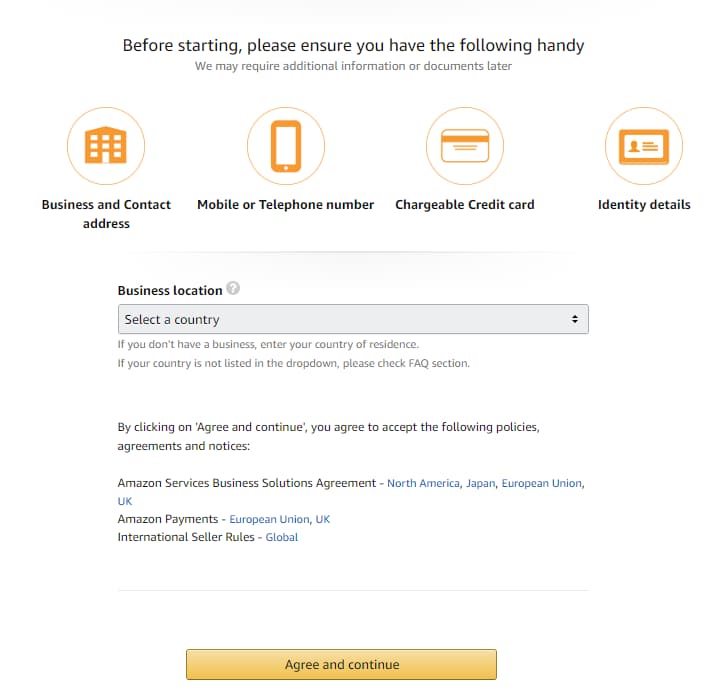
5. Choose your business location, i.e., a country where a legal entity or an individual is registered.
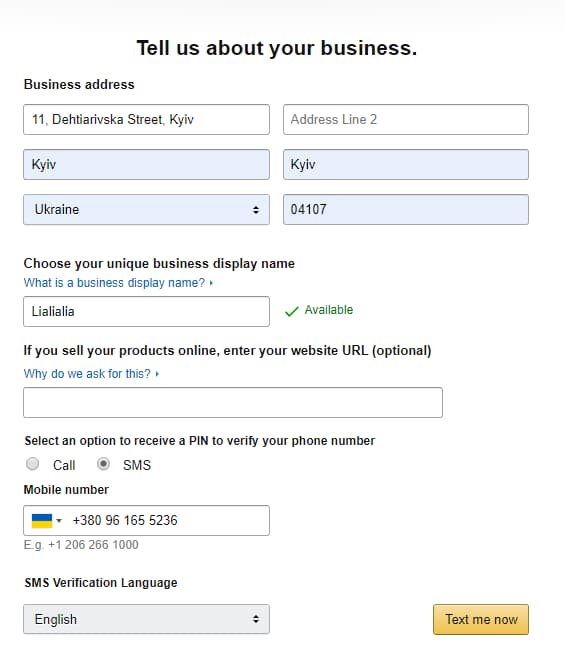
6. Fill in the following fields: a company name (or an individual name), address, phone number and seller name on the website.
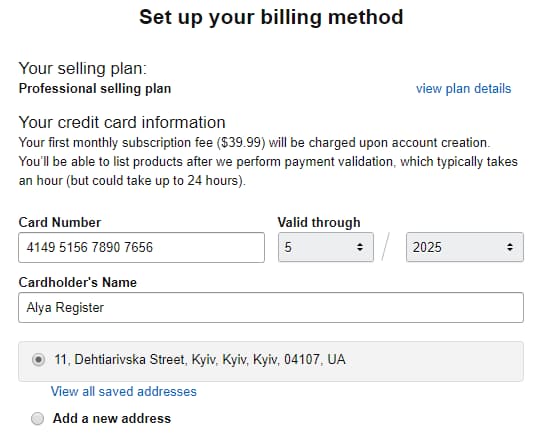
7. Specify your bank card details—it can be issued in any country and for any currency. Visa, MasterCard, American Express, Discover, Diners Club or JCB will do.
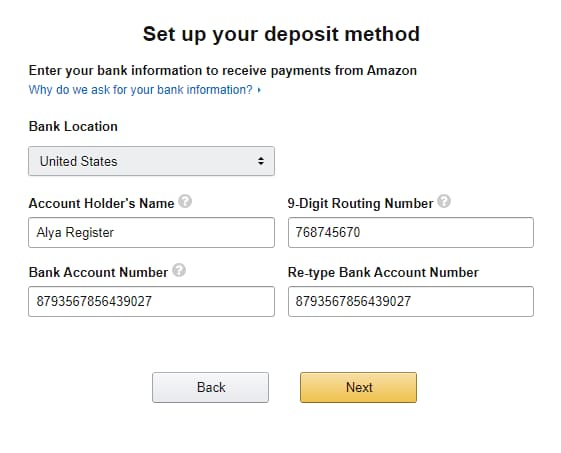
8. Enter your bank account details to receive transfers from Amazon. You can sign up for a Payoneer card to get a USA bank account.
Add your tax details. You need to answer whether you register as a legal entity or an individual as well as a resident or a non-resident of the USA, complete the “W9-BEN” form (basic details, such as your address, country of registration, etc.) and finally sign the form.
Add your listing and product categories. The system will ask for general data on your products: origin (hand-made or factory-made products), identifier type, batch volume, your website that features your products, etc.
Check the details you’ve entered and upload your passport and bank statement.
Done!
Step 4: Verification
Sometimes Amazon may ask you to provide additional documents once you’ve created your account. At this step, Amazon almost always blocks accounts until sellers prove their identity.
Next, Amazon emails you a request to provide additional documents to the address you’ve specified when creating your account and to Seller Performance Notifications.
Once you’ve logged in, you’ll see your notification highlighted in orange.
You’ll have messages from Amazon in the Performance Notifications section. Read all of them carefully to understand what information they want to receive from the seller.
After that, you need to send the pre-arranged documents: your utility bill, including gas, water, electricity or the Internet.
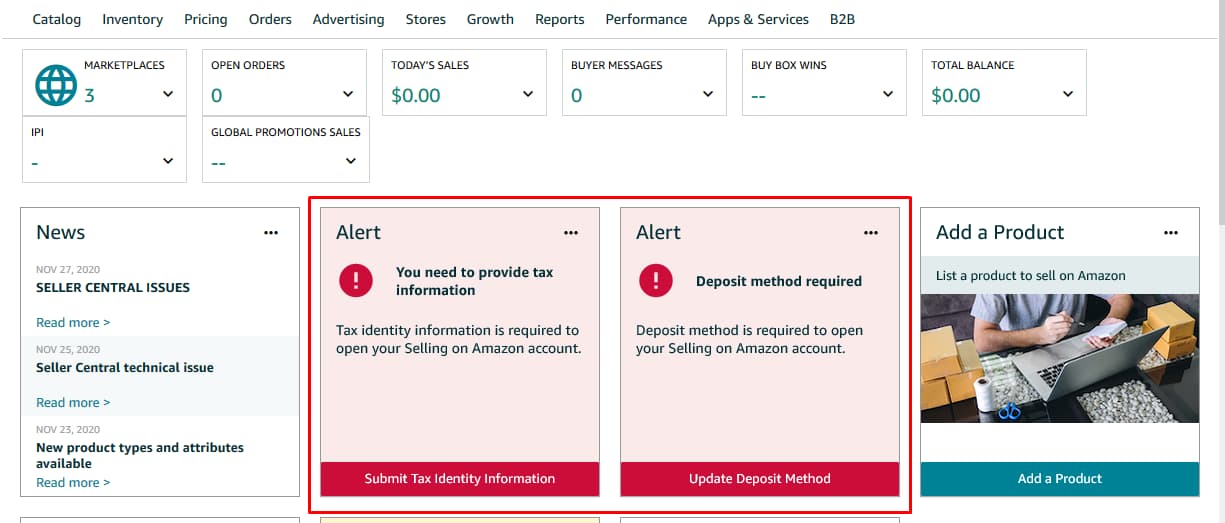
If you’ve skipped some of the blocks when creating your account, Amazon will ask to provide additional information once the account has been verified. You’ll see red windows on the home page. You need to click on them one after another and add the information required by Amazon.
____
It’s a sure thing that you can create an Amazon account on your own. But the reality is more and more beginners are automatically blocked by the platform.
Disqover Agency’s team helps you get the best experience on Amazon at all steps: creating an account, verification and turnkey account kick-off. We create Amazon accounts for the USA, Europe, UAE and Australia.
If you have any questions about creating Amazon accounts, our specialists will be happy to advise you on this matter for FREE. Please follow the link to leave your contact details, and we’ll get in touch with you as soon as possible!